Authorization Testing with BurpSuite’s Autorize

In this digital playground, one tool has been the superhero of the scene: Burp Suite! With its mighty powers, it helps us sniff out vulnerabilities like a bloodhound on a scent trail. And among its trusty sidekicks, we have the fabulous Autorize! This little gem is here to sprinkle some magic on authentication and authorization testing, making it a must-have for all you pentesters out there looking to protect your web applications like a pro.
So, grab your capes and let’s dive into the enchanting world of Autorize! In this post, we’ll explore its superpowers, how to install it (easy peasy lemon squeezy!), configure it to fit your needs, and unleash its potential in practical applications. Get ready to become the guardian of the web, one test at a time!
Introduction: Why Autorize Matters
Web application security hinges on two critical processes: authentication, which verifies a user’s identity, and authorization, which dictates what actions or data that user can access. Together, they form the bedrock of access control. However, vulnerabilities in authorization mechanisms, like inadequate role-based access control (RBAC) or broken access controls, can expose sensitive resources to unauthorized users, often with devastating consequences.
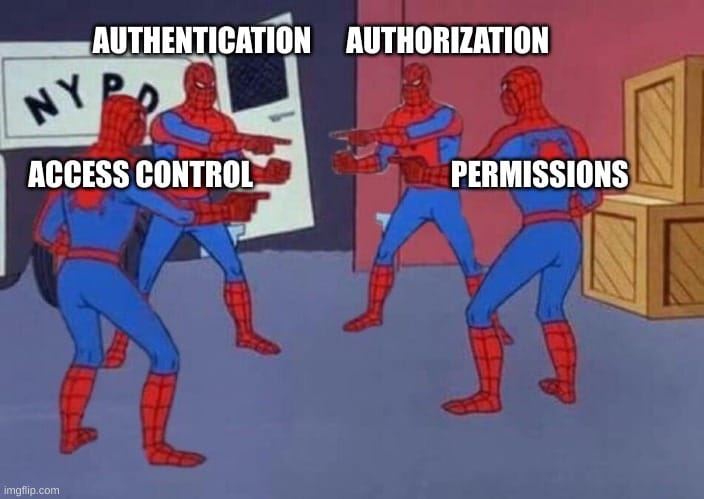
In simple word, web application security is like a superhero duo, with authentication and authorization teaming up to keep the bad guys at bay! Authentication is the trusty sidekick that checks if you’re really who you say you are, while authorization is the wise gatekeeper that decides what you can do once you’re in. Together, they create a fortress of access control!

Manual testing for these flaws is labor-intensive and prone to oversight, especially in complex applications. That’s where Autorize comes in, blending “Authenticate” and “Authorize” into a seamless testing tool. Integrated into Burp Suite, Autorize automates the detection of authorization-related vulnerabilities, empowering pentesters to efficiently uncover issues that might otherwise slip through the cracks.
Understanding Autorize: How It Works
Autorize simplifies authorization testing by intercepting requests, manipulating authentication tokens (e.g., cookies or headers), and analyzing server responses. Let’s break it down with a practical scenario, Imagine a web application with two user roles:
- Normal User: Like a friendly townsfolk, who can only peek at the treasures (read-only access) but can’t touch the royal jewels (no admin functions or database shenanigans). Limited to read-only access, barred from admin functions or database modifications.
- Admin User: Granted full read/write access to all features.
Here’s how Autorize operates:
- Capture Low Privilege Tokens: First, a Normal User (let’s call him Daniel the Wise, with the secret password Wise) logs in and captures their session cookie. This cookie is then handed over to Autorize
- Simulate High Privilege Actions: Next, Admin Log in as the admin user (let’s name him Administrator the Great, with the password admin😄) and navigate admin only sections. Autorize intercepts each request, swaps the admin cookie with the normal user’s cookie, and sends the modified request to the server.
- Analyze Responses: Now comes the moment of truth! If the server responds with a 200 OK (indicating success) instead of an error like “Access Denied,” Autorize waves its flag and shouts [Bypassed!] in a dramatic red! If everything is in order and the authorization is enforced, it gives a happy green [Enforced!] signal, like a green light for go!
This automation shines in large applications with dozens of endpoints, say, 30+ dynamic pages, where manually testing each URL would be impractical. Autorize also adapts to API testing (e.g., with JWT tokens), modifying authorization headers to detect bypasses in modern authentication schemes.

Common Vulnerabilities Detected by Autorize
Autorize excels at identifying a range of authorization related vulnerabilities, including:
- Inadequate Role-Based Access Control (RBAC): When roles or permissions are poorly enforced, allowing unauthorized access to restricted features or data.
- Broken Access Controls: Flaws that permit users to bypass restrictions and access resources or actions they shouldn’t.
- Insecure Direct Object References (IDOR): Cases where attackers manipulate inputs (e.g., user IDs) to access others’ data.
- Forced Browsing: Direct navigation to restricted URLs without proper checks.
- Insufficient Authorization: Weak permission enforcement enabling unauthorized actions.
- Horizontal and Vertical Privilege Escalation: Vulnerabilities allowing users to impersonate peers or gain higher privileges.
- Business Logic Flaws: Workflow manipulations that lead to unintended access or data exposure.
While Autorize is a potent tool, its effectiveness depends on proper configuration and manual verification to weed out false positives.

Installation and Setup
Getting Autorize up and running in Burp Suite is straightforward:
Step 1: Install Autorize
- Open Burp Suite and navigate to the Extensions tab.
- Select BApp Store.
- Search for “Autorize”.
- Click Install.
Step 2: Configure Jython
Autorize is Python-based and requires Jython:
- Download the Jython Standalone JAR from jython.org.
- Go to Settings > Extensions in Burp Suite.
- Under Python Environment, browse to the Jython JAR file and select it.
- Restart Burp Suite.
After restarting, the Autorize tab will appear in the interface, ready for use.
Navigation and Configuration Options
Autorize’s interface is divided into two key tabs: Request/Response Viewers and Configuration.
Request/Response Viewers Tab
This tab provides a detailed view of intercepted requests:
- Original Request: The unmodified request from the browser.
- Modified Request: The request with the normal user’s token substituted.
- Unauthenticated Request: The request with all authentication tokens removed (optional).
These views help you compare server behavior across different scenarios.
Configuration Tab
The Configuration tab is where you tailor Autorize to your needs:
- Autorize State: Off by default; toggle it on to start capturing requests.
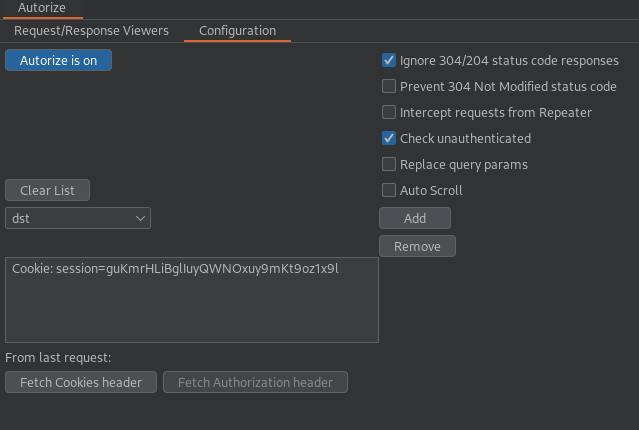
- Temporary Header Box: Input the normal user’s tokens (e.g., cookies or JWTs) here. Use “Fetch Cookies header” or “Fetch Authorization header” to auto-populate from the last request.
- Enforcement Detector: Define how Autorize identifies denied access (e.g., “Body contains: Access Denied”). Add filters and adjust logic (AND/OR) based on the app’s error messages.
- Unauthenticated Detector: This is Similar to the Enforcement Detector, but for unauthenticated requests.
- Interception Filter: Defaults to “Scope items only,” ignoring spider requests and images. Customize as needed.
- Match/Replace: Modify specific parameters (e.g., replace u.name with a.name) for advanced testing.
- Table Filter: View results by status:
- Red [Bypassed!]: Potential vulnerability.
- Orange [Is enforced!]: Likely protected, but verify manually.
- Green [Enforced!]: Access properly restricted.
Practical Demonstration: Autorize in Action
Let’s apply Autorize to a Port Swigger lab, “Method-based access control can be circumvented,” to see it in action.
Step 1: Capture Normal User Cookies
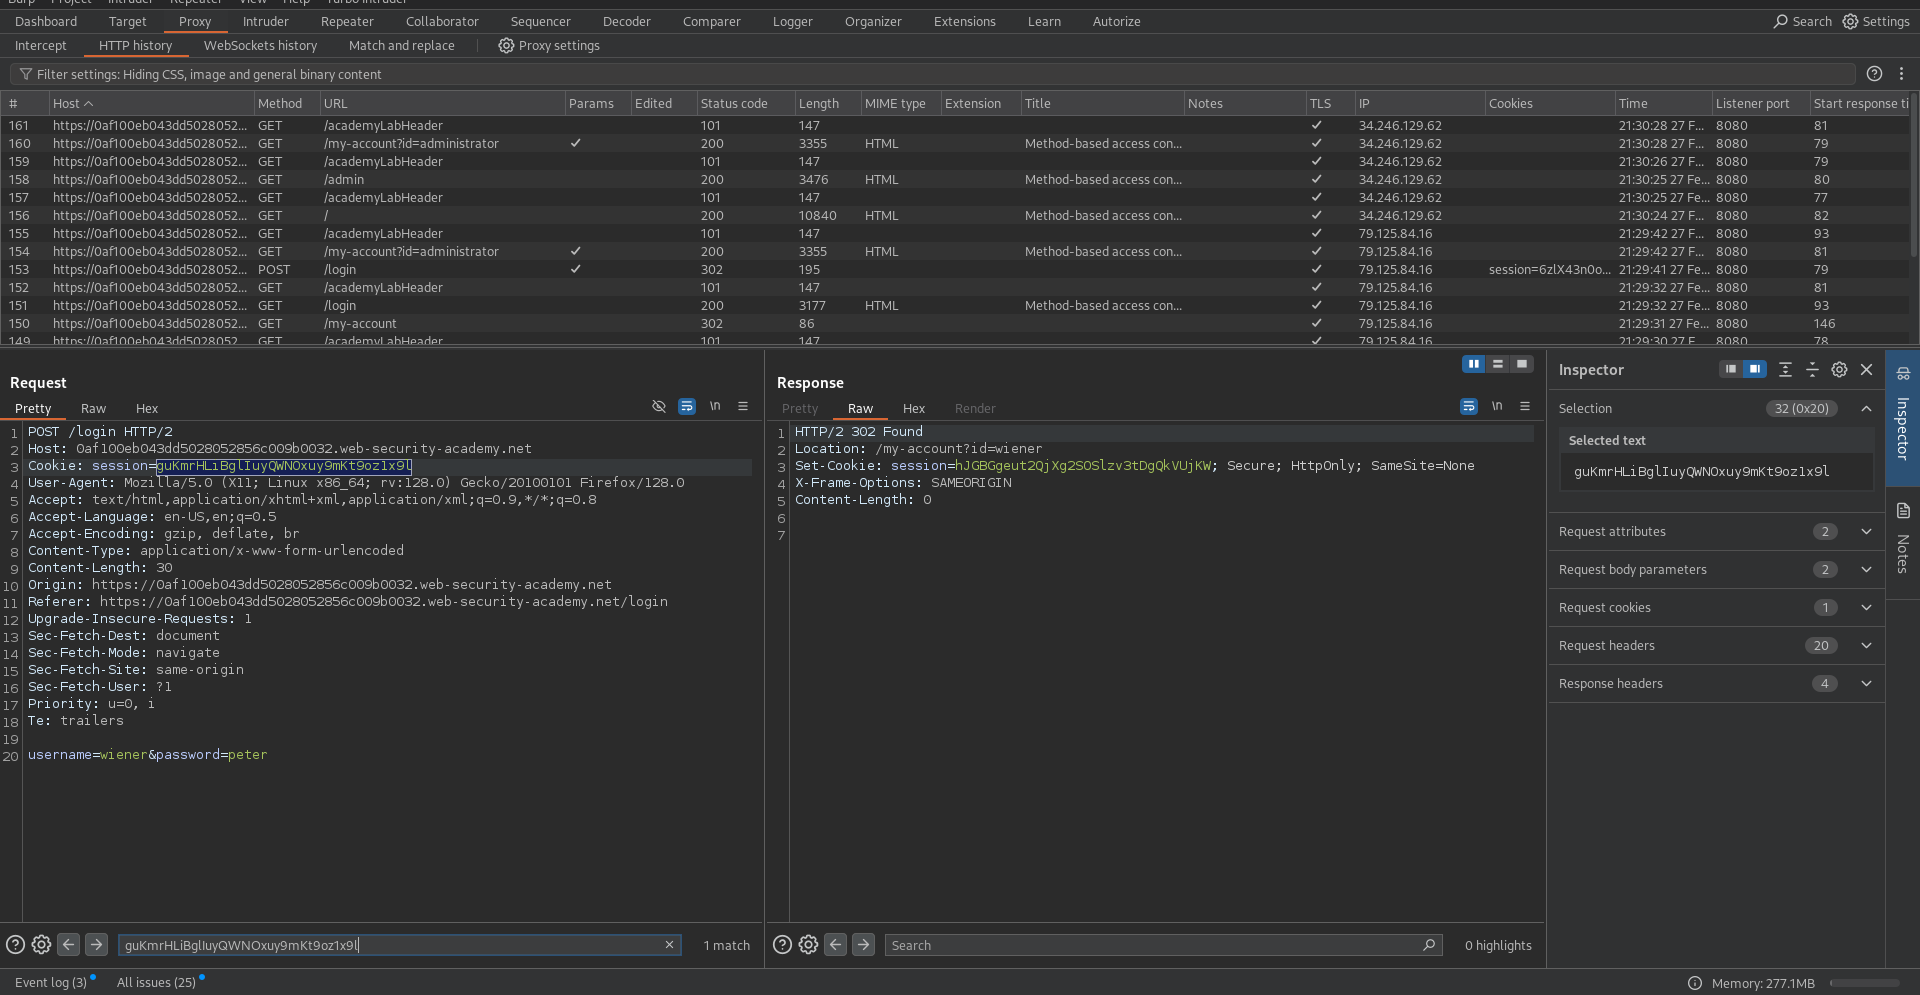
- Access the lab and log in as the normal user (wiener:peter).
- Capture the session cookie from the login request (e.g., via Burp’s Proxy).

Step 2: Configure Autorize
- Paste the cookie into the Temporary header box.
- Set the Enforcement Detector to recognize “Access Denied” or similar.
- Turn Autorize on.

Step 3: Test Admin Access
- Log in as the admin user (administrator:admin).
- Browse admin-only URLs (e.g., database update pages).
Step 4: Review Results
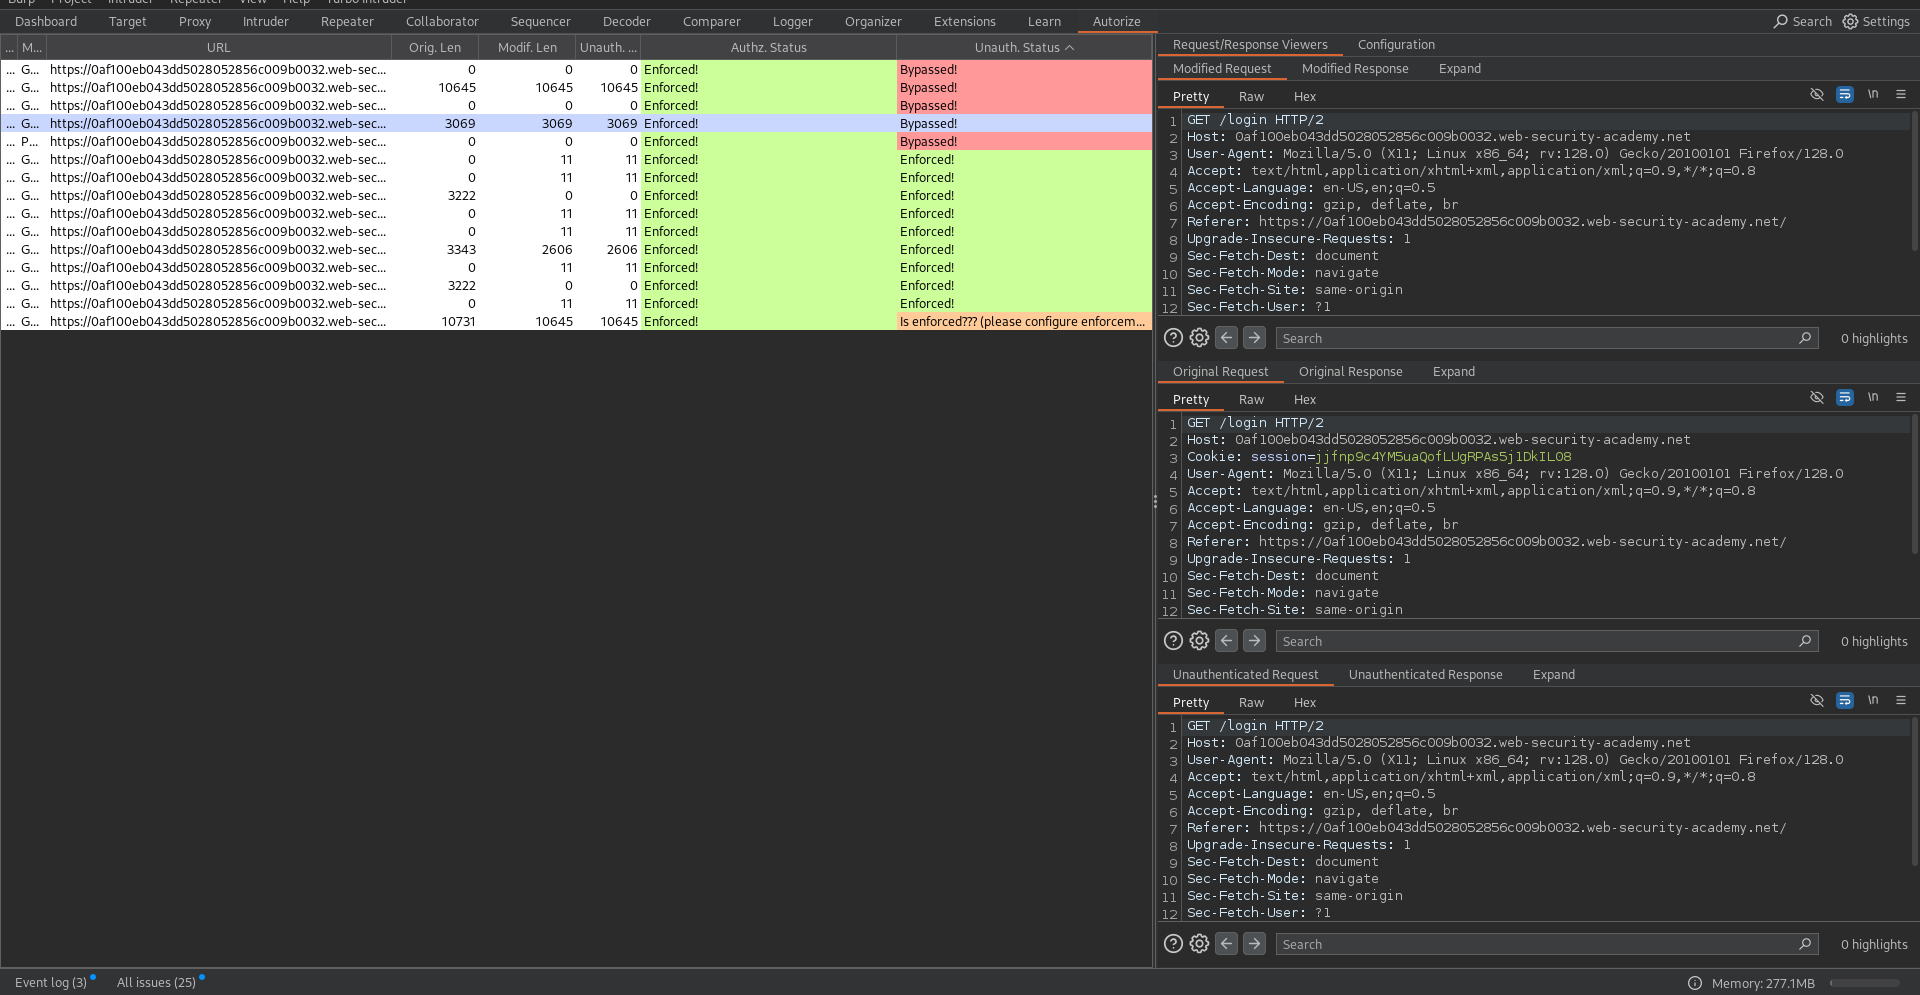
In the Autorize tab:

- Red [Bypassed!]: Indicates endpoints where the normal user’s cookie accessed admin functions (e.g., requests 1, 2, 6, 7).
- Orange [Is enforced!]: Suggests protection, but requires manual confirmation.
- Green [Enforced!]: Confirms proper access control.
For each flagged request, inspect the Original, Modified, and Unauthenticated responses. Cross-check red highlights manually,false positives are possible.

Conclusion
And there you have it. The Autorize extension transforms Burp Suite into a powerhouse for authorization testing, automating the detection of critical vulnerabilities like IDOR and privilege escalation. By streamlining the process, it saves time and enhances the thoroughness of security assessments. For pentesters, programmers, and cybersecurity professionals, Autorize is an essential tool to ensure web applications enforce access controls effectively.
Integrate Autorize into your workflow, configure it thoughtfully, and always verify results manually. With this extension, you’re better equipped to protect online assets and stay ahead of potential threats.
Happy hacking!


